If your kitchen cabinets are in decent shape but they sound like a bowling alley every time someone grabs a mug, soft-close dampers are one of my favorite low-cost upgrades. You get that quiet, “finished” feel without replacing doors, swapping hinges, or tearing anything out.
These little mechanisms are made for retrofits. Many are simple screw-in parts that are forgiving on older cabinets. Some styles clip onto a mounting plate or adapter. Either way, they are usually doable in an afternoon, even if your kitchen is mid-paint job.
What soft-close dampers do
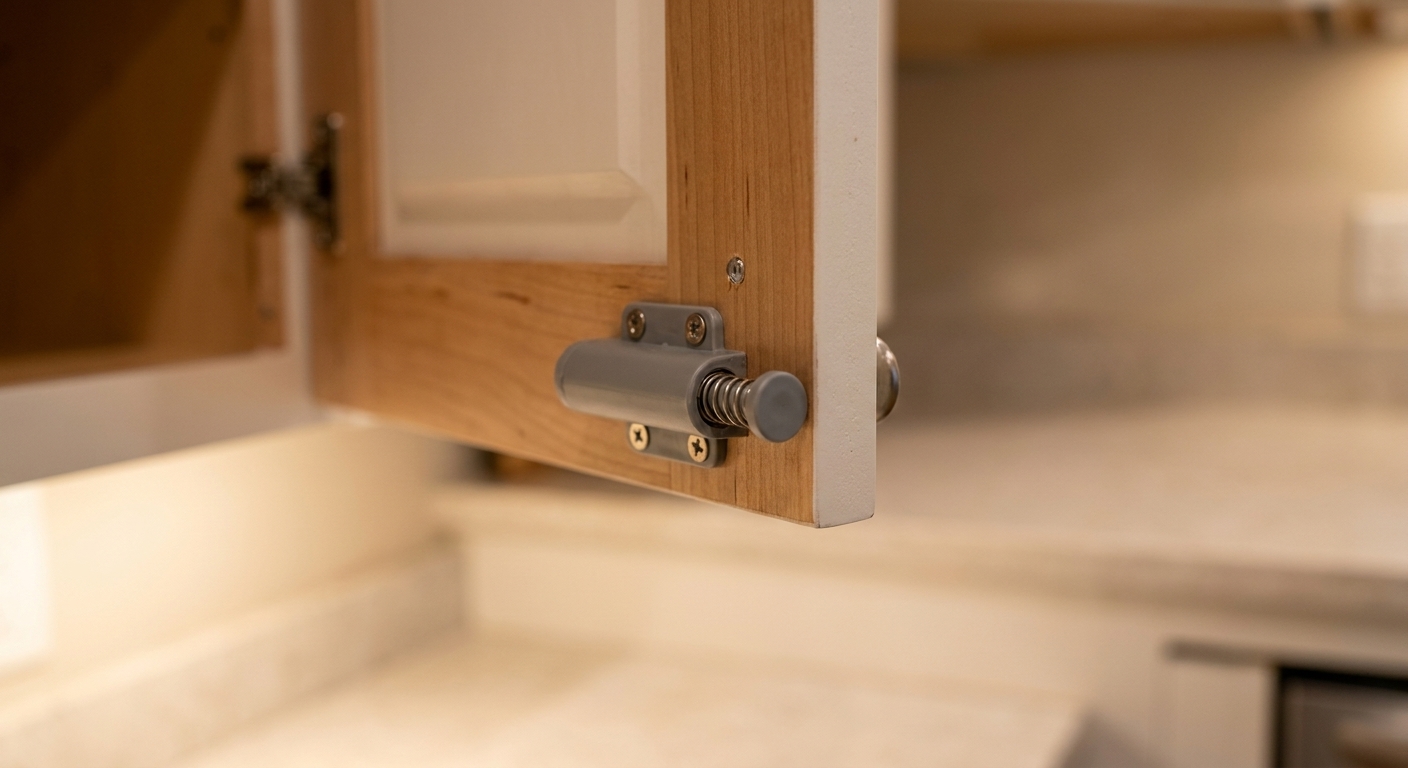
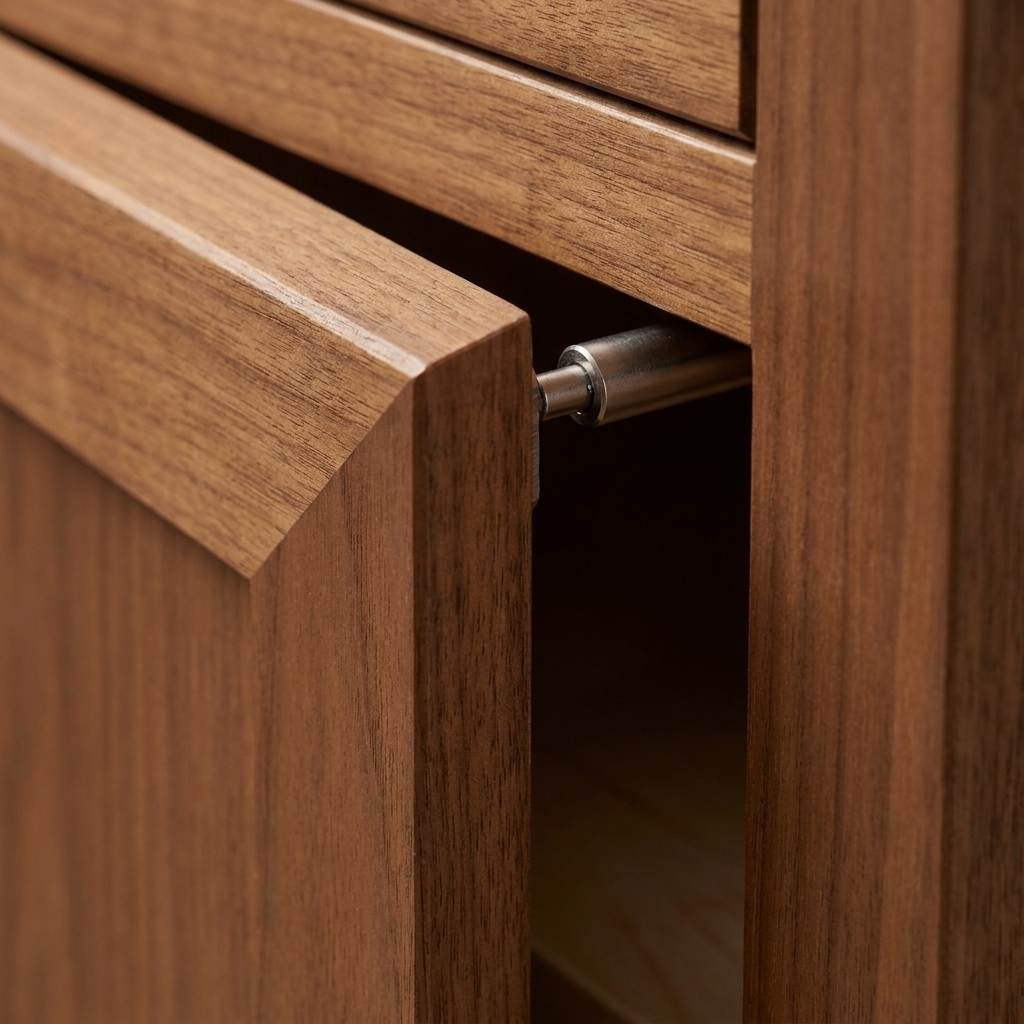
A soft-close damper is a small piston or spring-damped catch that slows the last few inches of a closing door. Think of it as a gentle brake at the end.
Soft-close hinges are different. Many combine a spring and a damper, so they can help pull the door closed from slightly open (how far depends on the hinge). Dampers, by contrast, mainly control the final part of the closing motion.
That is why dampers are such a great retrofit. If your hinges are older, basic, or not compatible with soft-close hinge replacements, dampers can still cut noise for very little money.
Choose the right type
Cabinet doors: face frame dampers
Most budget kits are designed for face frame cabinets (common in many older homes). They mount to the inside edge of the frame near a corner, and the door hits the plunger as it closes.
- Best for: standard swing doors with a frame around the opening
- Usually includes: damper body plus one or two screws
- Cost: typically a few dollars per door, often less in multi-packs
Frameless cabinets: side panel or plate-mounted dampers
If your cabinet box does not have a face frame (smooth opening, European style), you can still add dampers, but the mounting location changes. Look for models that screw into the cabinet side panel, or clip into a compatible mounting plate.
- Best for: frameless cabinet boxes
- Tip: check cabinet wall thickness so screws do not poke through
- Also check: that the door will have a flat “strike” spot to contact, or that your kit includes a small adapter pad
Drawers: buffers, bumpers, and one other option
Here is my honest take: adding true soft-close to older drawers often means replacing slides with soft-close slides. It costs more and takes more measuring, but it delivers that slow, controlled glide.
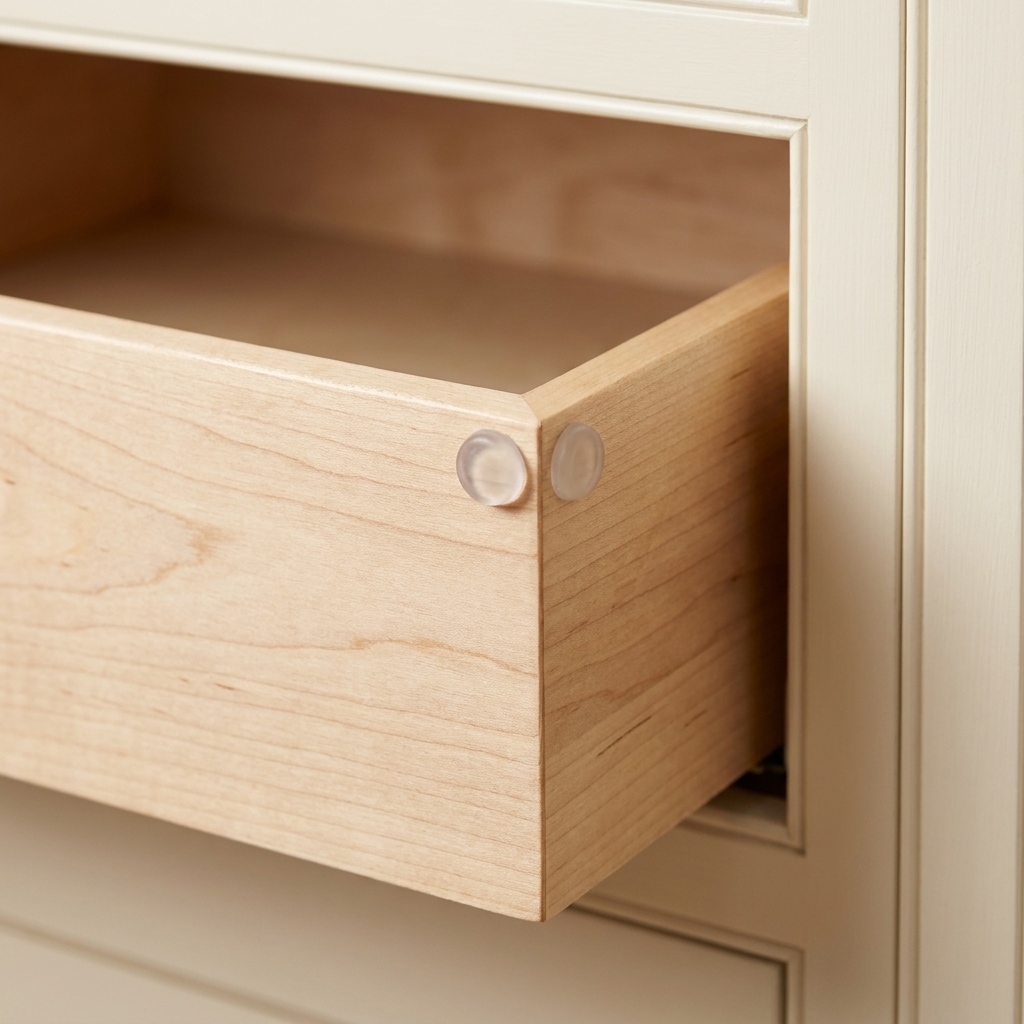
If you want a quick win without slide replacement, small drawer bumpers or soft-close buffers can cushion the last bit of impact. They reduce banging, but they do not create the full soft-close glide on their own.
One more possibility: some drawer systems accept add-on soft-close modules that mount to the cabinet or slide. They can work well, but they are very model-specific, so you have to match the add-on to your exact slide or hardware family.
- Best for: reducing drawer slam noise fast
- Not the same as: full soft-close drawer slides
Tools and supplies
- Soft-close dampers (one per door is often enough, two for wide or heavy doors)
- #2 Phillips screwdriver
- Drill and small drill bit for pilot holes (highly recommended for old hardwood frames)
- Tape measure or small ruler
- Pencil
- Optional: toothpicks and wood glue (for stripped screw holes)
- Optional: self-adhesive felt pads or clear bumpers (for fine-tuning sound)
- Optional: safety glasses (a good idea any time you drill)
Before you start
1) Face frame or frameless?
Open a door and look at the cabinet opening. If there is a wooden frame around the opening, you have face frame cabinets. That is the easiest retrofit situation.
2) Overlay or inset?
Overlay doors sit on top of the cabinet frame. Inset doors sit flush inside the frame opening. Dampers can work for both, but inset doors have tighter clearances, so test-fit carefully so the damper does not push the door proud.
3) Check hinge behavior
Most dampers work with basic hinges because they mount to the cabinet, not the hinge. But if your hinges already have built-in soft close, adding dampers can make the door feel sluggish or bouncy. Start with one door and see how it feels before you outfit the whole kitchen.
4) Fix alignment first
If a door is sagging or rubbing, adjust it before you install dampers. Otherwise the door may hit the damper at a weird angle and feel sticky.
5) Make sure nothing will interfere
Before you commit to screws, confirm the damper will not collide with a hinge arm, shelf edge, rollout tray, or face frame lip. When you test-close, keep fingers clear of pinch points.
Install dampers on doors
I am going to walk you through the most common setup: a screw-in damper mounted on a face frame near the top, hinge side. Always defer to the manufacturer instructions and any included template, especially for frameless cabinets and Euro hinges.
Step 1: Pick the corner
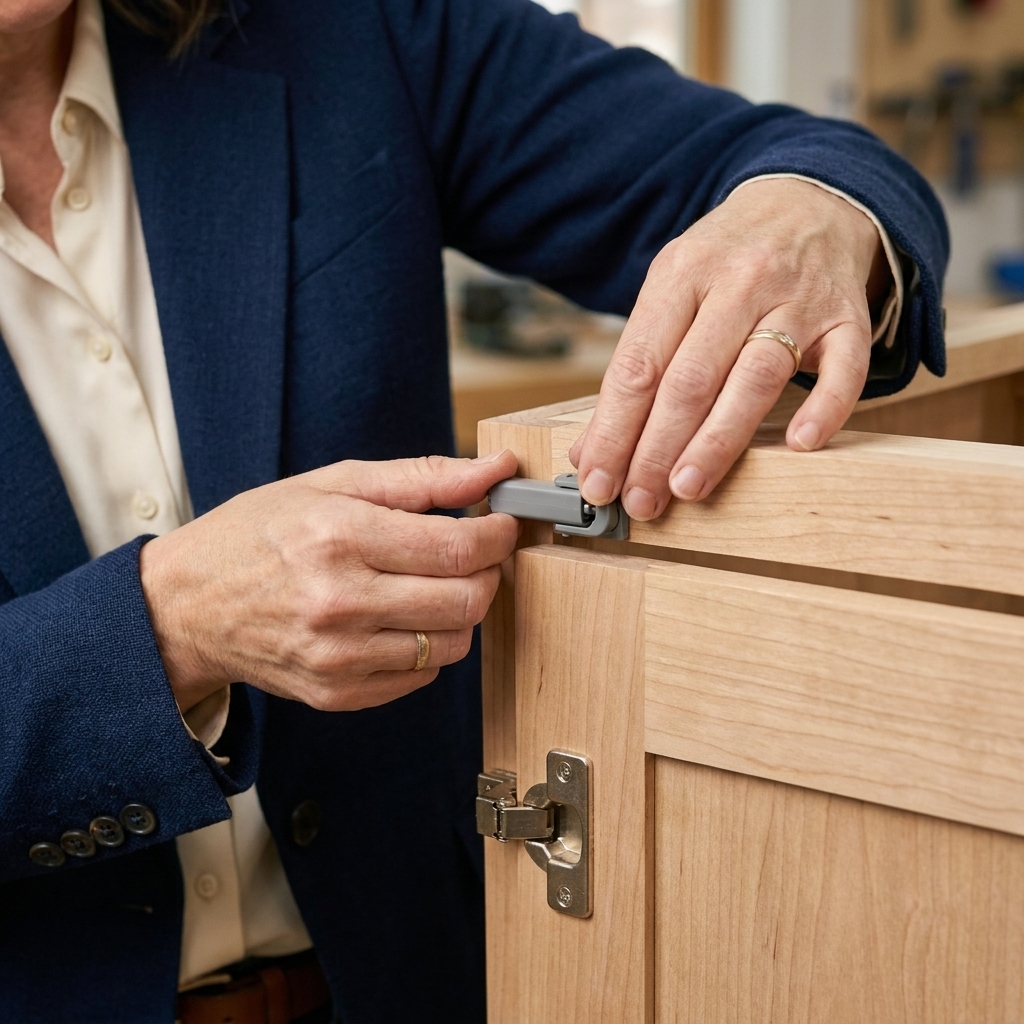
I usually install a single damper at the top corner on the hinge side. It is out of sight, and it gives a nice controlled close.
- Tall pantry doors: consider two dampers, top and bottom
- Wide or heavy doors: two dampers can feel better
Step 2: Test-fit the contact point
Hold the damper in place and slowly close the door. You want the door edge to contact the plunger squarely in the last couple inches of closing.
Most dampers have a little adjustability. You might see slotted screw holes that let you shift the body about 1/8 inch, or an adjustable plunger depth. Use that range to get clean contact without forcing the door.
Step 3: Mark and drill pilot holes
Older face frames can be surprisingly hard wood. Pilot holes help prevent splitting and stripped screws.
- Mark screw locations with a pencil.
- Drill shallow pilot holes with a bit slightly smaller than the screw shank.
Step 4: Screw the damper in
Attach the damper snugly, but do not crank it down so hard that you strip the wood. Close the door gently and listen.
Step 5: Tune the close
If your damper has an adjustment dial or twist mechanism, start in the middle setting and tweak from there.
- Door still slams: shift the damper so it engages a little earlier, or increase the damping setting
- Door does not fully close: decrease damping, shift the damper so it engages later, and check latch alignment
- Door bounces back open: the damper is likely engaging too early or set too strong, and a stiff self-close hinge spring can exaggerate the bounce
Money-saving tips
Buy multi-packs and start with the loud doors
If your budget is tight, start with the doors you hear the most: trash area, dish cabinet, kid snack cabinet. A small pack can make the kitchen feel instantly calmer.
One per door is usually enough
Unless you have a very tall or heavy door, one damper is a solid improvement. You can always add a second later if you want a more premium feel.
Add bumpers to kill the last tap
Even with a damper, some doors still make a light tap when they meet the frame. A clear rubber bumper on the opposite corner is the cheapest sound upgrade I know.
Older drawers
Option A: Add cushioned bumpers
Clean the contact area, then add clear bumpers where the drawer front meets the cabinet frame. You will be shocked how much this cuts the sharp slap sound.
Option B: Add a buffer or catch
Some retrofit kits include a small spring or buffer that mounts inside the cabinet near the drawer opening. They help with the last inch of closing, but results vary depending on drawer construction and slide style.
If you want true soft-close drawer action, plan for soft-close slides in a future phase, or check whether your current slide system supports a compatible add-on soft-close module. That is a fantastic upgrade, it just is not always the cheapest today fix.
Troubleshooting
The damper hits in the wrong spot
Shift it slightly closer to the door edge, or nudge it forward or back so the door contacts the plunger more squarely. Tiny adjustments matter.
Screw holes stripped out
This is common in older, dry wood.
- Remove the screw.
- Dip toothpicks in wood glue and pack them into the hole.
- Let it set per the glue directions before re-screwing (often 30 to 60 minutes). Full cure is typically around 24 hours.
Door slows down but will not latch
Decrease damper strength if adjustable, or reposition it so it engages later. Then check that your latch or magnetic catch is aligned and still strong enough to hold the door shut. Dampers do not replace a latch that is worn out.
Painted cabinets: will screws crack my finish?
If you have recently painted your cabinets (especially enamel or cabinet-specific paint), drill pilot holes and go slow. A sharp bit and light pressure help prevent chipping. If you are mid-project, install dampers after your paint has cured enough to handle gentle contact.
Placement cheat sheet
- Standard upper and lower doors: one damper at top hinge side, typically about 1 to 2 inches down from the inside corner (or per the kit instructions)
- Heavy doors or pantry doors: two dampers, top and bottom hinge side
- Glass-front doors: start with one and use the lightest setting to avoid bounce
- Inset doors: test-fit and confirm clearance so the door still sits flush
FAQ
Do I need new hinges for soft close?
No. Dampers are designed to add soft-close behavior without hinge replacement. If you want the door to pull itself closed from more open (depending on the hinge model), that is when soft-close hinges are the better choice.
Will dampers work with latches?
Usually, yes, as long as the latch is aligned and not overly stiff. If the door struggles to latch, reduce the damping strength or move the damper so it engages later.
How many dampers do I need?
Plan on one per door to start. Add a second for wide, tall, or heavy doors if you want a more controlled close.
Can I install dampers on painted cabinets?
Yes. Drill pilot holes, use the provided screws, and avoid over-tightening. If your cabinets were painted very recently, give the paint time to cure so the door edge does not stick when it touches the damper.
Quiet cabinets, same kitchen
If you are refinishing your kitchen on a budget, soft-close dampers are one of those small upgrades that makes your whole space feel more high-end. They pair beautifully with freshly painted doors, new pulls, and cleaned-up hinges.
Take it one cabinet at a time, test-fit before you commit to screws, and remember: tiny adjustments are the difference between “meh” and “wow, why did I not do this sooner?”